Monday, March 6, 2023

Organizing dies.

 I have to say this is not as exciting as making and sharing my art but I'm pretty pleased with how my die organizing worked out.

I've been using the Tonic Studio Binders and the white tin for my dies for a few years but to be honest they were not organized at all, so it was always kind of annoying to find things. Even though I'm using 3 different methods to keep the dies in, they are now categorized and will be so much nicer to find and put away.

I've been using this tin for year to keep my nesting dies and larger panel dies. It worked okay but they weren't labeled and in files like they are now. 
I made these little files with the WeR Envelope punch board and Score board to keep the dies separate and label them. Aren't they cute!! Maybe I'll colour them too!

I've had these Tonic Studio binders for a number of years too but they were never organized and I didn't have the labels with them. I didn't think the labels were necessary, but for some of the ones that have multiple part to assemble, it really does help.


This Totally Tiffany system is new to me and I have to say so far I think it's going to be my new favourite. It's so easy to take the magnetic sheet in and out to work with. And I like the way they have tabs to label them. It makes it easy to flip through to see them. They also have room in the sleeve for the packaging labels.


So how do you organize and store your dies. Do you have any tips for me that I should change or try?


Happy creating/organizing!

Wendy


Saturday, December 3, 2022

Tis the season for cards.

 Are you a maker of cards? Do you make and send your own Christmas cards?

Well I guess you know I am. Some of my cards get sold and some go to friends and family. But I am never very good at doing it early. Often the start of December sees me just starting to make my seasonal cards.

Each year I do a variety of cards, some designs similar to previous years and some new designs. I often have a design that becomes my favourite to play with for that year. This year I have been playing with a forest background done with Distress inks and Oxides. It's a fun and versatile background to make a variety of cards.

Since I've finally been able to get back at teaching in the studio this year I've scheduled a few workshops with this technique. I can't wait to see what new twists my students will do with it.


Once we learn to create this forest background we will explore some techniques using die cutting, embossing powder and a few other surprises.

If you've been making your own cards I hope you'll share some pics of them in the comments. I'd love to see them.

If you're interesting in doing the Forest card class you can find more info and registration here.

Happy Card Making Creative Friends

Wendy


Wednesday, September 28, 2022

Art journaling in progress.

 This months theme in Dragonfly Dreamers Exploration group is '30 ways to fill you art journal'. It's been good to spend so much time in my art journals. I'd like to tell you that I spend some time art journaling everyday but real life just doesn't work that way. So I art journal whenever I get a chance. Sometimes it may be 5 minutes and others it may be hours. It gets whatever and whenever life allows.


If you've followed along with my art journaling at all, you may have noticed that I don't work on one page at a time. Actually I don't even work in one journal at a time. Nor do I work from the front to back of an art journal much to the surprise of a student, I had recently, who just couldn't fathom that was a thing people did. Well yes it's a think people do. At least I'm pretty sure I'm not alone in this practice. I like to just open up to whatever page is calling me at the moment and start there or continue if the page is already started.

This page layout was comprised of about 5 or 6 short, 5 to 15 minute sessions over about a week. In that time I probably worked on some other pages but this one kept calling and telling me what it wanted next. Sometimes that's how it works. Other times a page can take months or years before it calls me back to finish it.

Mica spray and watercolour ink
The first layer on the spread was just a quick splash of Cosmic Shimmer Watercolor ink and Distress Mica spray. I love the contrast of the shimmery spray with the matte watercolor ink. A quick background that took less than 5 minutes to do but then needed lots of dry time. It could be dried with a heat gun but the effects are different and my time was up anyway.

Washi tape and stamping
Next I used washi tape. I like to rip the tape length wise to get rid of the harsh straight lines. Using a large stamp without a block helps to give that random stamping look. I used Archival ink for this because I know it will be permanent no matter what I want to add on top of it.


Stabilo all, graphite and embossing powder

A few lines and squiggles with the Stabilo all pencil and graphite stick help bring everything together. Since they are both water soluble I used a wet brush to loosen up and smudge the lines a bit. The gears are a die that I added embossing powder to before adhering them to the page.
Stencil, grit paste and Fude pen

I had to add some grit paste because it was new on my desk and just asking to be tried. The brick stencil just seemed to work with the grungy layout. I discovered that the grit paste will reactivate anything water-soluble that you put it on, so where it is on top of the Distress mica sprays it turned a lovely rusty red. You can see the actual colour of the Grit Paste in the top right hand corner.

To finish off the page I used the Fude Ball pen to darken some of the lines and do some writing. 

If you'd like to see more of my pages as well as other members for '30 days to fill your art journal' you can find us here.


Happy Creative!

Wendy


Friday, April 29, 2022

Creative process.


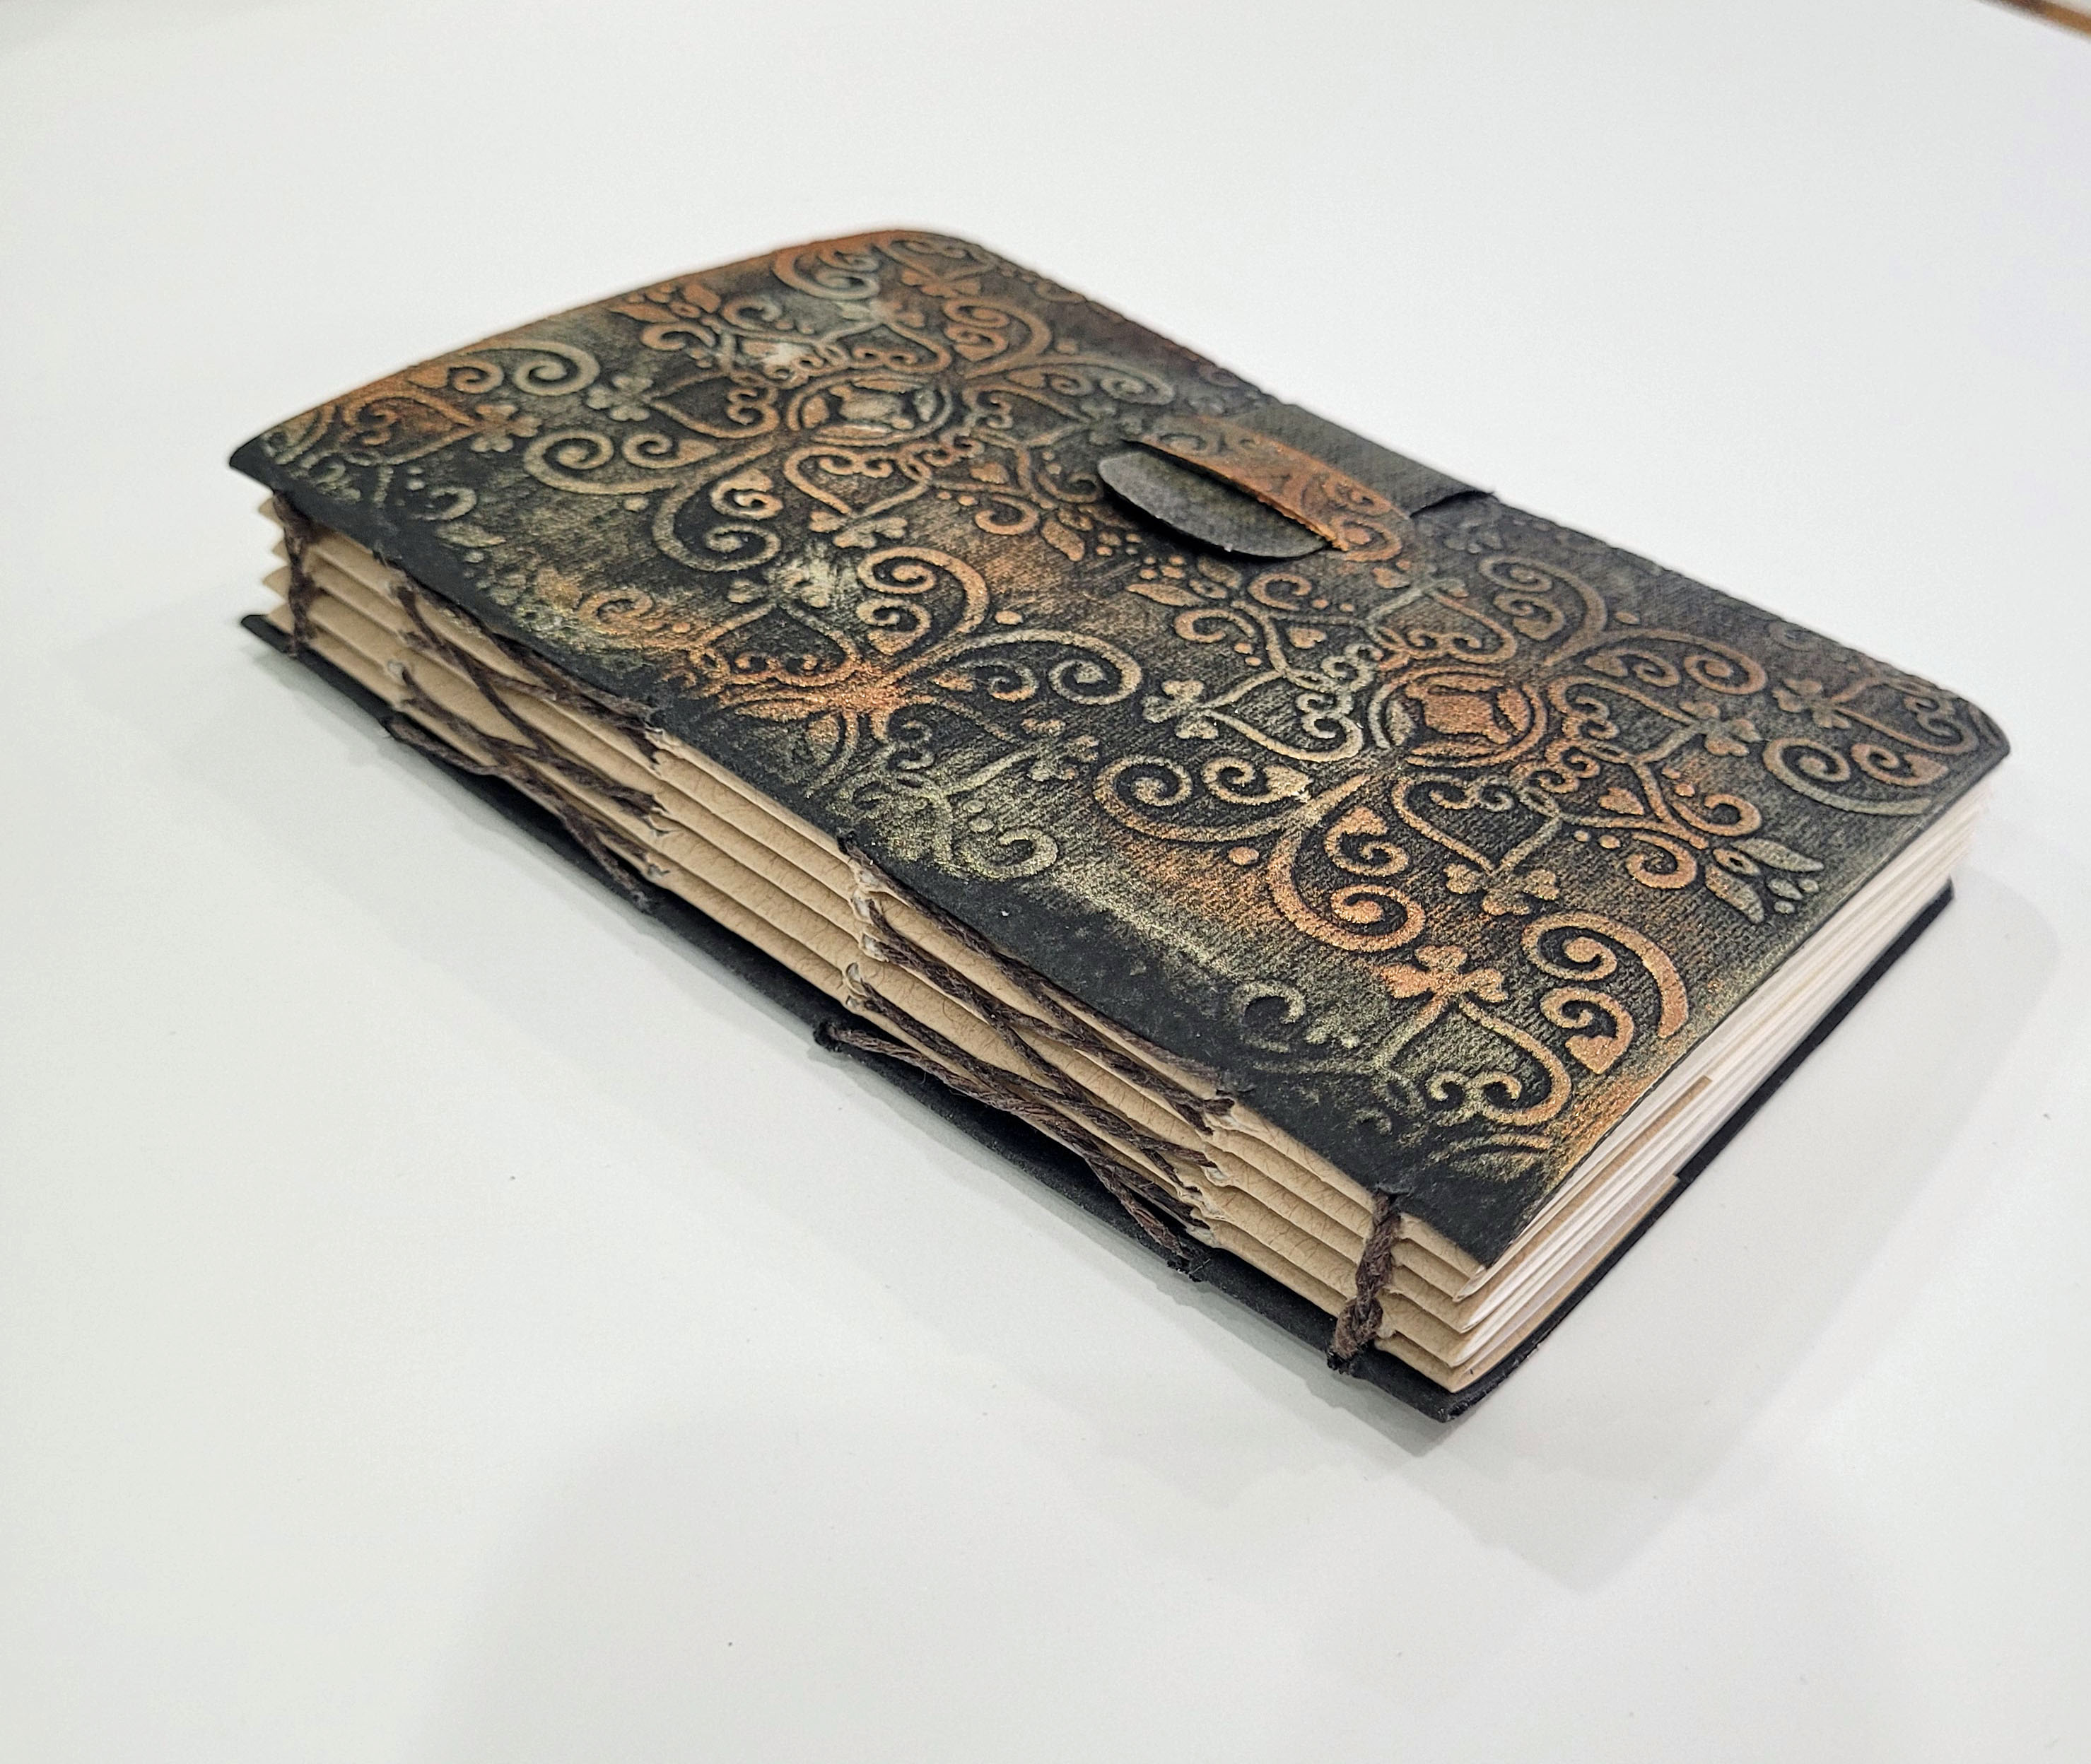
Kraft-tex, french stitch binding books

I find it interesting to see some of the processes that artists go through in creating a new project. I think for myself a lot of these processes are intuitive so I'm not really aware of some of the mechanisms of it. Stepping back and being more aware of some of the processes can actually be very helpful to me in future projects. 

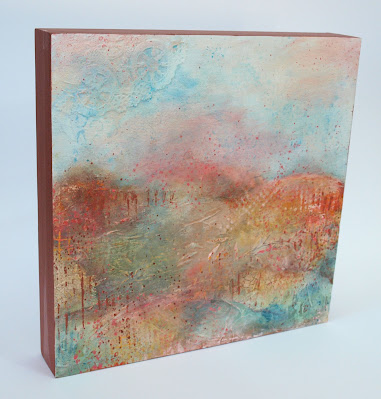
One of the things I've realized I do is use small 4" x 4" paper tiles, usually a fairly heavy Brisol or Watercolour paper that can withstand anything I throw at it. This lets me play with different techniques, mediums and colour palettes without thinking about the end product or worrying about more pricey materials that I may be thinking of for the final project. And when I am done and ready to move onto the final project, I'm more confident about where I'm going with that project and I'm left with lot's of fun background tiles that more often than not get made into cards. I sometimes use odd sizes of papers thinking they are just samples but they get tossed around and are harder to use for other projects.

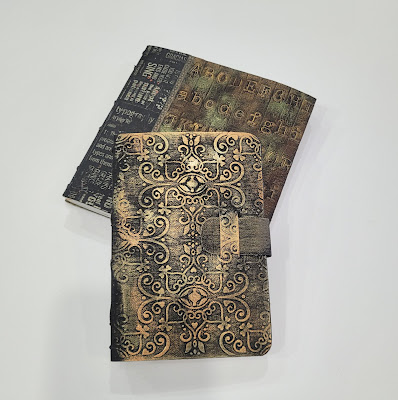
French stitch binding.


I had an idea for making these books with embossing folders and Kraft-tex paper. I wasn't sure what I wanted to use to colour them so this is where the tiles came in handy. Actually because I wanted to see how the Kraft-tex was going to work with the paints, I started with some left over strips of both black and white. I embossed them with regular and 3D embossing folders and then coloured them with Finnabair Waxes. These will probably become bookmarks.

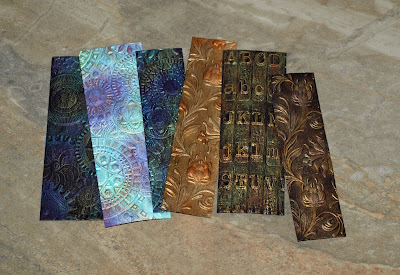
Bookmark possibilities.

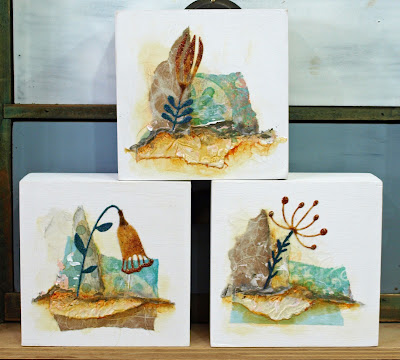
I discovered that the Kraft-tex seemed to play the same with the colours as regular paper so I switched to some black and white cardstock tiles for more trials. Next I tried Cosmic Shimmers Gilding Polish on the embossed papers. This I discovered was somewhat addictive. As much as I love my waxes the polishes proved to be easier and faster to use for this technique. When I was finally able to stop myself from making more backgrounds I started making some cards. The backgrounds on these are lovely by themselves and somewhat busy so I felt like I didn't needed to add much to finish them.


I used the Cosmic Shimmers Gilding Polish on the backgrounds of all of these cards. 

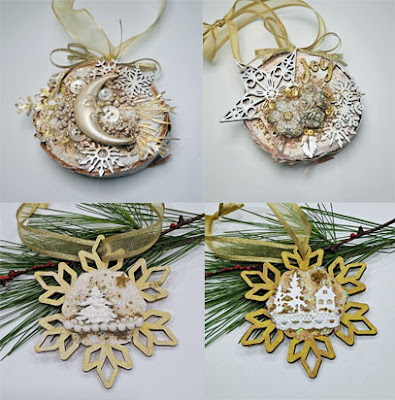
A few notes about Finnabair waxes and Cosmic Shimmers Gilding Polish.  Both products have a great metallic finish to them and both are permanent when dry. For blending colours the waxes work better. They have more open time and blend wonderfully. Since the Polishes are acrylic based they dry very quickly and don't blend well but they do layer well and are quite opaque. I found myself going back and forth with the different polish colours and loved the way I could add more colours on top of each other. Both products can be applied with a variety of tools such as fingers, brushes or small sponges. My preferred method for the waxes are small dry brushes. For the polishes the applicator that comes with it works very well.

Wax and Polish.

Well this started out as process oriented and turned into product info. Oh well, hope you liked it. If you've use these products, let me know how you liked them and what's your favourite way to use them. If you have any questions about them let me know and I will do my best to answer them. 

I'd love to hear about your creative process

Keep an eye out (fingers crossed) for workshops coming soon.

Happy Creating
Wendy


Monday, March 7, 2022

Kraftex watercolour book.

This month on Dragonfly Dreamers Monthly Exploration facebook group the theme is watercolour. I'm not a watercolour artist by any means but I do like to play with it and it sometimes finds it's way into my mixed media projects. 

So the first thing I needed to do is make a watercolour book to play in.

I decided to try a few new things while making my book. As a carry-over from last month's theme of  'use it or lose it', I decided to do the cover with some Kraft-Tex paper that I have had for a while but haven't tried yet.  It's an interesting paper that they describe as leather like and can be sewn like fabric. I was pleased to discover that it played very well with the watercolours.

Layer one.

I used Daniel Smith and Twinkling H2O watercolours. The first layer I painted with a very generous amount of water. While still wet I sprinkled coarse salt on and let dry completely before wiping off the salt. This gives an interesting texture to the paint. 

To learn more about this technique watch this video. For my book cover I didn't use the isopropyl as I did in the video.

Watercolour, isopropyl and salt.


Layer two.


For the second layer I used Lindy's Gang Magical powder with a stencil. This is a pigment powder with mica. Unfortunately it's not noticeable on the picture but it has a lovely shimmer to it.

French Link Stitch


Now to put it all together. For the inside pages I used a 140 lb watercolour cold press paper. The final size of the book is about 8" square. To stitch it together I tried a new technique called French Link stitch. To help learn this stitch I used a book I have called Little Book of Book Making by Charlotte Rivers and watched this great video by Jennifer of Sea Lemon.

French Link Stitch.

Finished book

I'm sure I will do a little bit more playing with my covers but for the most part it is done and I'm pretty happy with my first attempt at the French Stitch binding method. 

If you'd like to see what everyone is doing with the 'watercolour' theme this month come join us at DDMET.


Happy Creating!

Wendy


Monday, January 17, 2022

Time for an update.


Hello dear artsy friends.

 I can't believe I haven't posted here since last May. How are you doing? Are you keeping creative? Through all the uncertain times of the last few years I have tried to keep creating but I haven't been as good at keeping in touch through social media. No promises but I hope to make that better this year. I thought I would start here by sharing a few of my favourite things that I made last year.


Nature collages.
 These little collage works are on 4" x 4" wood gallery canvases.

I believe that I have finally discovered white space in my art. That makes it sound like it is something that needs to be there which it isn't. It was just something that I was becoming aware of seeing but not able to do. Sometimes with the best intentions of leaving some white space I would end up filling up the whole area with collage and colour. These little canvases are one of my favourite projects I have done while working on finding white space. With this discovery I have found a calmness both while creating them and in the finished pieces.


Summer Haze

I have found myself using softer colours in the last year. Sometimes it is the colours I choose or the addition of white gesso that creates this effect. This one is on a 10" x 10" wood gallery canvas. It has many layers of collage, paints and mark making on it.

Winter escape ornaments.

In November and December I found myself falling into a creative white hole. These dimensional ornaments on wood slices and wood snowflakes were a wonderful distracts at a busy time of year. 


So what have you been up to? Please share your creative endeavors in the comments. I'd love to see them.


Happy Creating!

Wendy

Wednesday, May 12, 2021

Creative momentum...

 How are you keeping creative?

Nov. 2020 theme Lines and Circles


  One of the things that gives me some creative momentum is to have some kind of focus for a short time. I started doing this a few years ago by having a theme each month. It doesn't mean I don't work on other project, not of this theme at the same time, but it helps to keep my mind a little more focused when there is too much going on in it, which is most of the time. If I am overwhelmed with ideas or just can't decide what to do I can think about my theme at the moment and find a small project to get me going. It's often what I work on in the evenings when I'm watching TV.

Dec. 2020 theme- Trees


Another thing that keeps me motivated with my themes is to share with others. A few years ago I started a Facebook group called Dragonfly Dreamers Monthly Explorations. I have a great group of creatives in the group now, that join me for a different theme each month. If you'd like to join in, come on over and take a look. 

March 2021 theme- Faces


I work in a lot of different mediums and projects during the monthly themes but in the last few months, in the Facebook group, we have been doing lot's of ATC's and trading. This is a great way to get and stay motivated. ATC's are an easy, fast way to get your creative momentum going.


February 2021 theme- February

This months theme is Flowers. Who doesn't want more flowers in May. Check it out at Dragonfly Dreamers Monthly Exploration Themes.

Happy Creating!
Wendy

LinkWithin

Related Posts Plugin for WordPress, Blogger...